SmartFace data displayed in Nx Witness
In this chapter you can find information about the SmartFace information displayed in Nx Witness and also about how to configure this information .
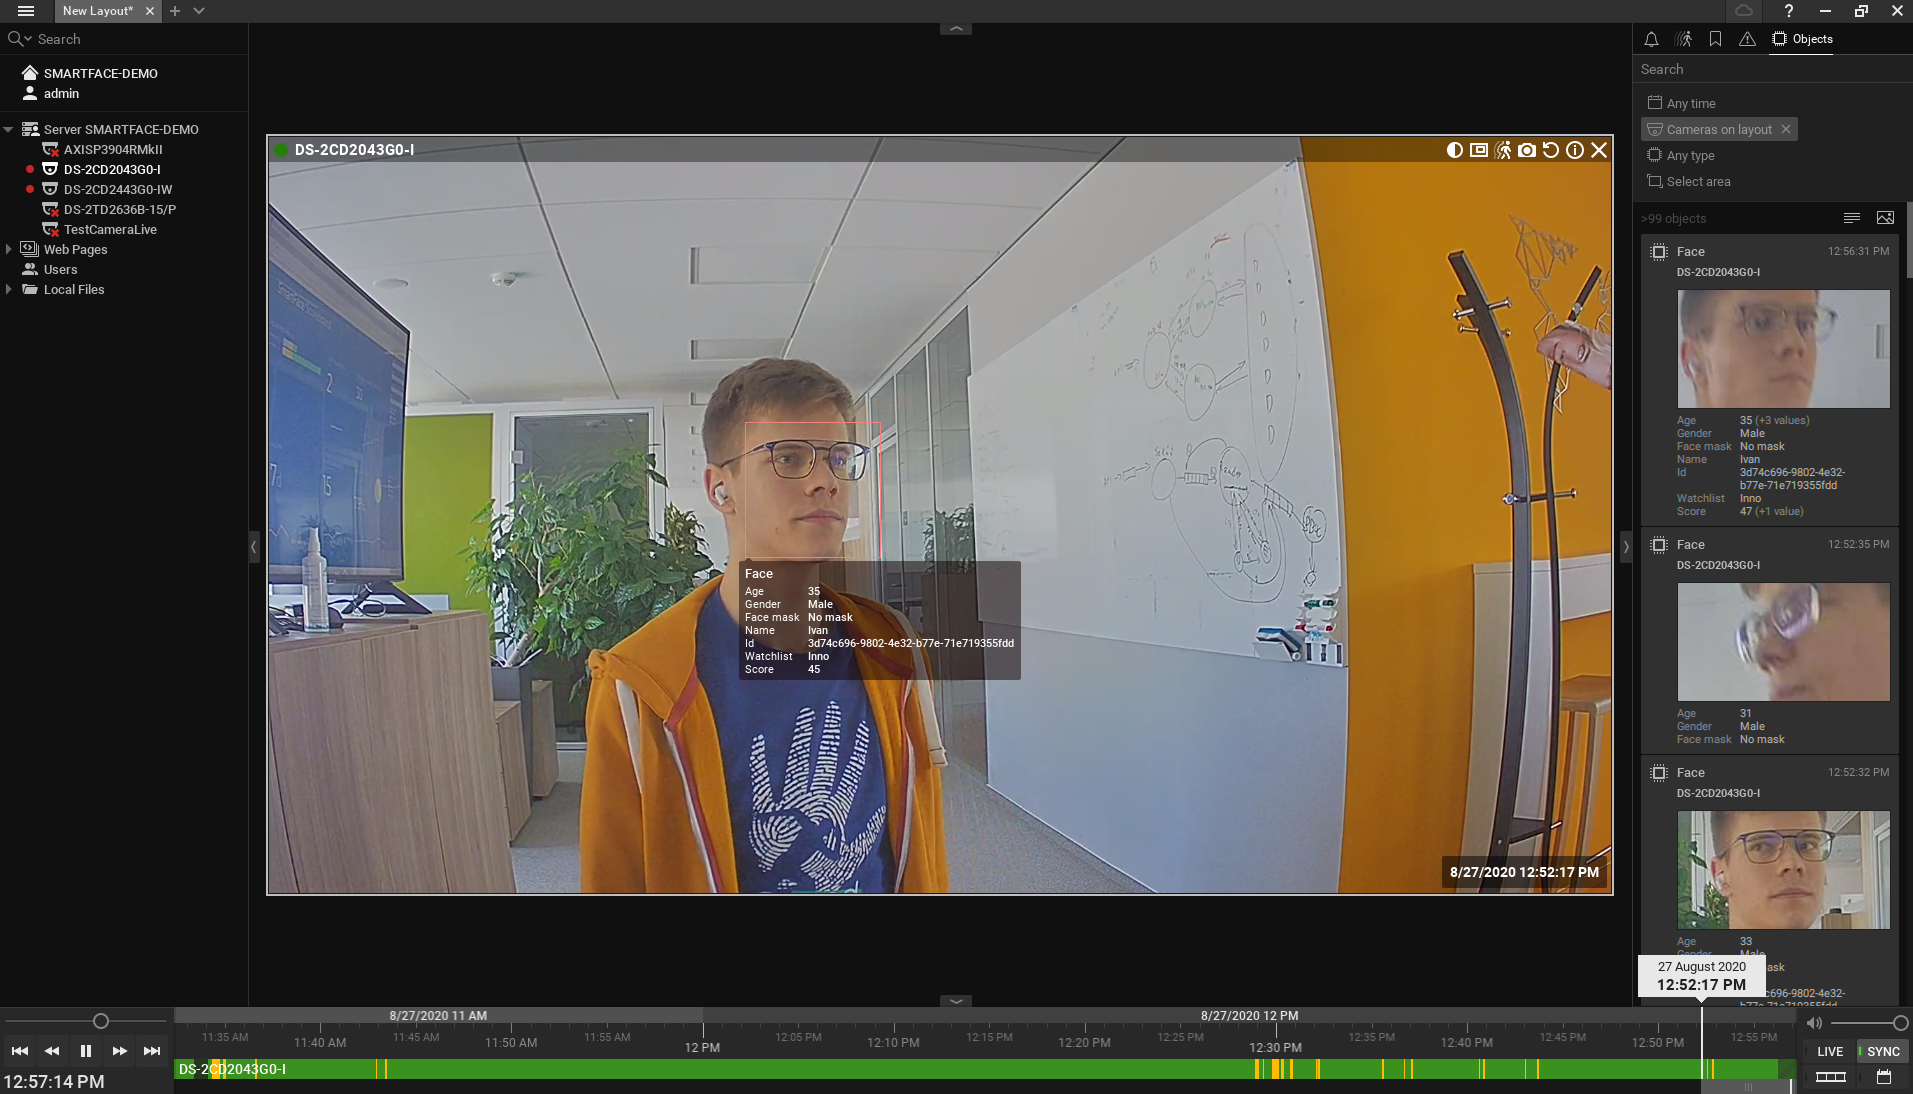
Faces which are detected by SmartFace are displayed as Face objects in the Nx Witness VMS video items. The position of the face is tracked as it moves in the video, which enables Nx Witness to render bounding boxes around the detected faces.
All detected faces are automatically matched against all members saved in watchlists available in SmartFace. If the detected face is matched against a watch list member in SmartFace, then information about the watchlist name , watchlist member and the matching score is also displayed.
For an identified person Nx Witness displays the following attributes:
Age – Estimated age
Gender – Female or Male
Face mask – Information if the detected person is wearing a mask
Name – The name of the person who is saved as a watchlist member
Id – ID of the watchlist member
Watchlist – The name of the watchlist in which the detected person is stored as a watchlist member
Score – The matching score of the detected face and the matched watchlist member
IsSpoof - True or False (if spoof detection is configured).
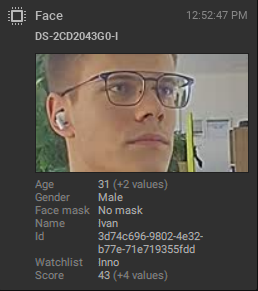 Face preview in the Objects tab
To display the face attributes, select the Objects tab in the right pane. After that the face attributes are displayed in two locations – on the camera item, in the Overlay info and in the right panel, in the Objects tab. The difference between these views is that the Overlay info displays face attributes continuously from the obtained information, but the Object tab displays the first obtained face attributes and marks other information in brackets.
Configure which SmartFace information is displayed
In the left panel, right-click the camera for which you want to set up which SmartFace information is displayed and select Camera Settings.
Go to Plugins and select SmartFace analytics plugin.
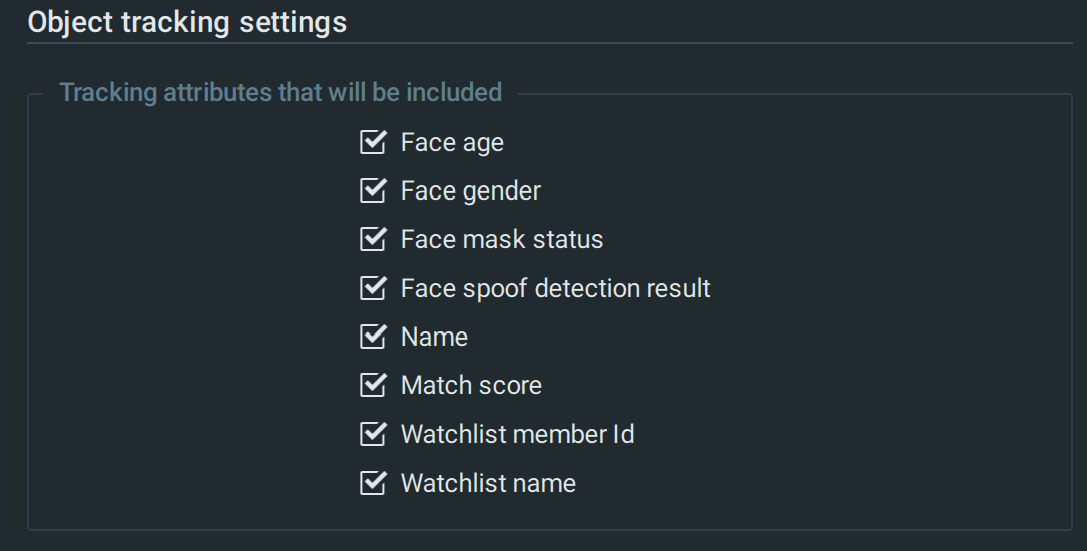
To enable or disable a face tracking attribute , mark or clear the relevant checkboxes in the Object tracking settings section (see the figure below).
Repeat the steps for each camera for which you want to set up these settings.
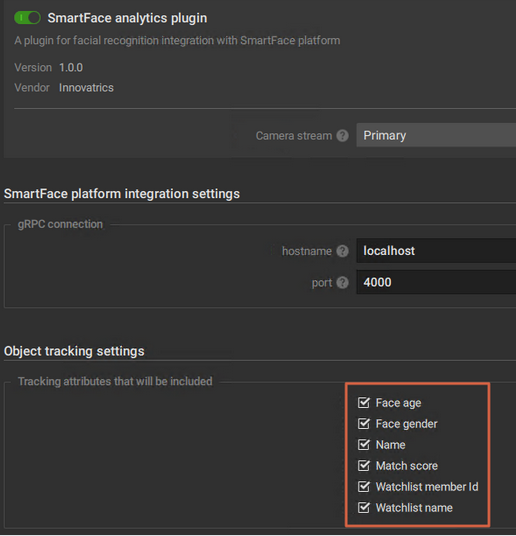 IMAGE UPDATED: