Installation of Nx Witness integration on a single machine
To install and configure SmartFace integration with Nx Witness on a single machine, follow these steps:
Install SmartFace Platform
Install SmartFace Platform v4.1 or higher.
Please note that in the step of Camera setup configuration, you should choose the number of slots according to the number of Nx cameras which need to be processed.
You can find the complete guide in Installation on Windows using installer.
Install Nx Witness VMS
Install Nx Witness VMS v4.X or later. You will need both Server and Client, as the Client will be used in configuration.
Install and configure the integration components
Stop the Nx Witness server by right-clicking the tray icon and selecting Stop Server .
Download the SmartFace analytics plugin from our CRM portal and unzip the .dll file to {NxInstallPath}\plugins\ . For example, for Nx Witness on Windows to C:\Program Files\Network Optix\Nx Witness\MediaServer\plugins.
(optional) In case you would like to brand the plugin with your own labels, specify the plugin white labeling, i:
Create sf_plugin_branding.json file in the installation path of Nx Witness server (Default windows path is C:\Program Files\Network Optix\Nx Witness\MediaServer\ ).
Use formatting of a json file below:
sf_plugin_branding.json{"product_name":"SmartFace Platform","plugin_name":"SmartFace analytics plugin","vendor_name":"Innovatrics"}Change labels for your desired branding
Branding file
It is important to create the branding file with branding changes prior to the first start of Nx Witness server with SmartFace analytics plugin. Otherwise you won't be able to change the branding of the plugin anymore. When plugin is loaded for the first time Nx Witness caches a plugin information about the branding into the database which can not be modified later on without an uninstallation of Nx Witness!
Start the Nx Witness VMS.
In the left panel, right-click the camera you want to process with SmartFace and select Camera Settings. In the Plugins tab, enable the SmartFace analytics plugin
 .
Repeat the step for each camera that you want to process with SmartFace.
.
Repeat the step for each camera that you want to process with SmartFace.
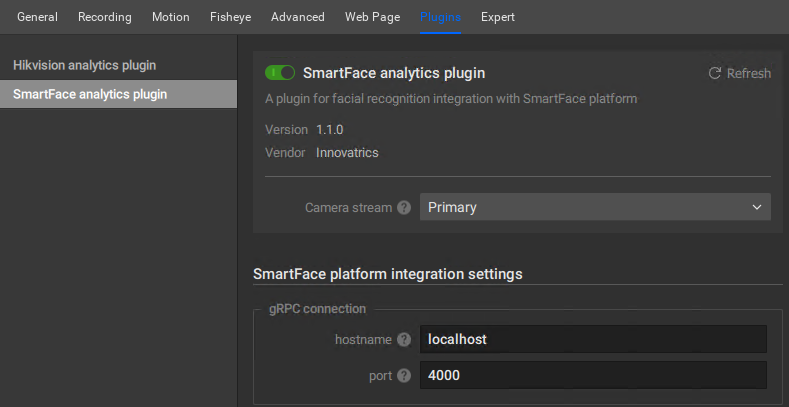
In Camera Settings of the analytics plugin, set a unique port for each camera that should be processed by SmartFace. We recommend to start from port 4000 . This is a TCP port which is used for a communication between the Nx Witness p lugin and SmartFace C amera services.
Create a camera using the SmartFace API:
SmartFace Platform is managed through the API. By default, the API is hosted on port 8098 and Swagger UI is available on localhost:8098/index.html.
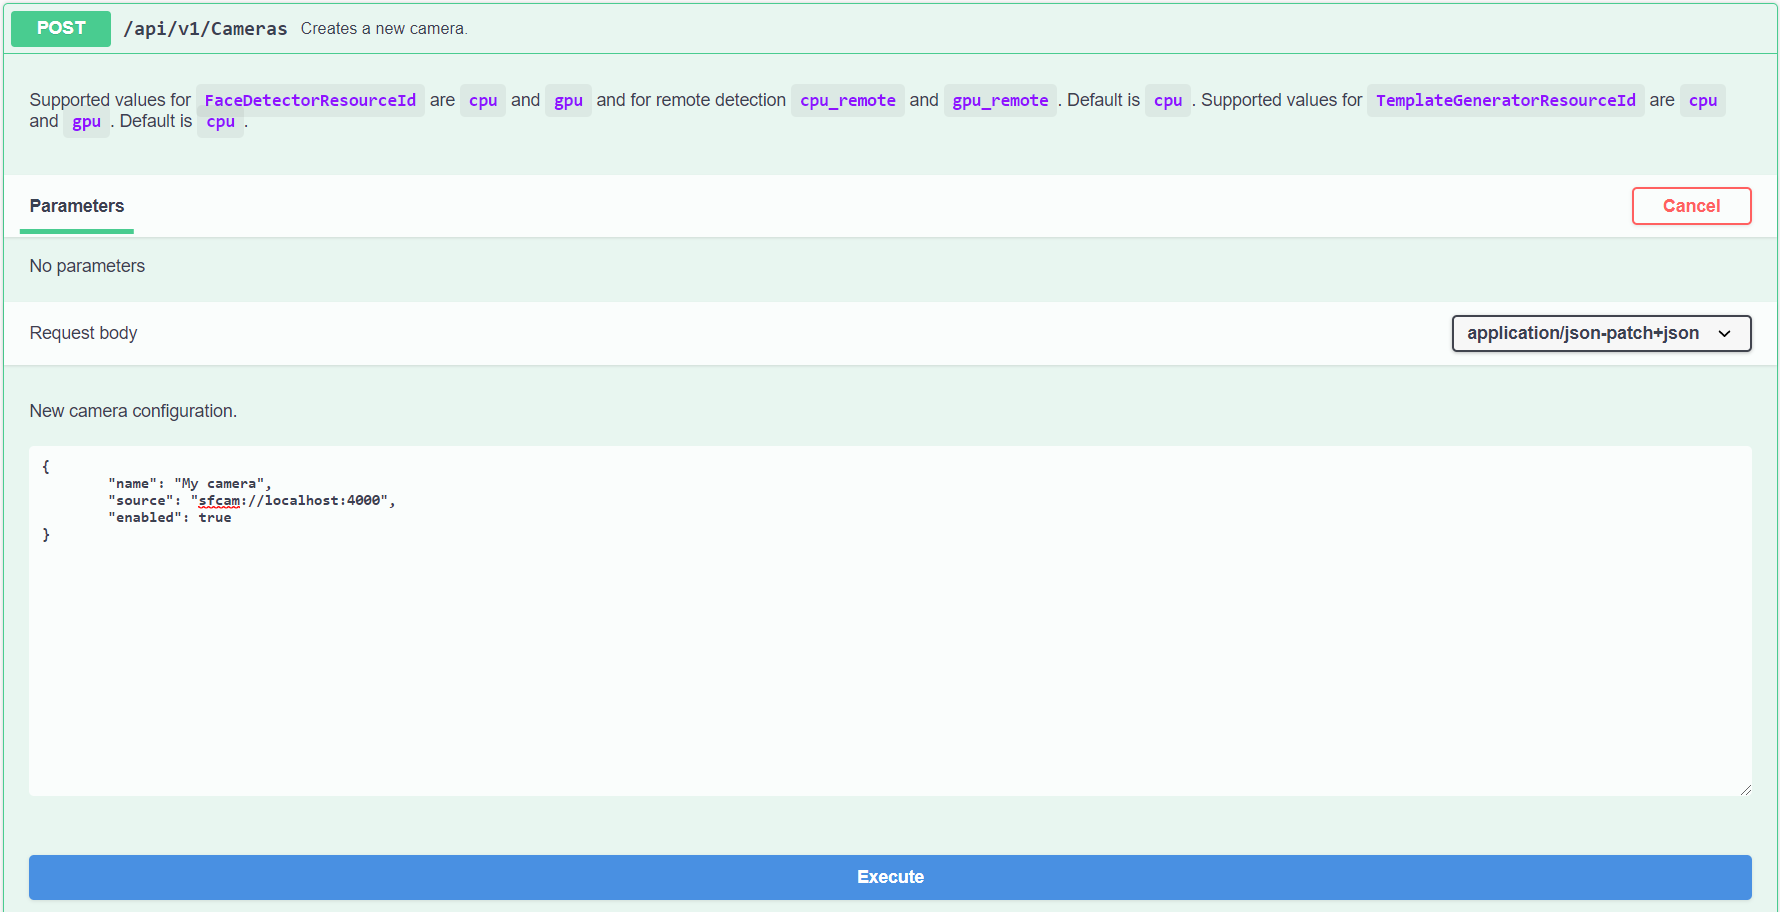
The endpoint to create the camera is POST /api/v1/Cameras. To find it in Swagger UI, go to the Camera section, open the POST call and click Try it out. Delete the prefilled request body and then fill it according to the following Example request body:
Example request body{"name":"My camera","source":"sfcam://localhost:4000","enabled":true}Set the name property as an arbitrary string used to identify the camera.
Set the source property to the custom string in the format sfcam://<host>:<port>. For example, sfcam://localhost:4000 where:
<host> is the address (IPv4 or hostname) of the machine where Nx server is hosted as accessible from the SmartFace Camera service. In most cases the value localhost should suffice.
<port> is the TCP communication port that you have set in the Nx Witness camera plugin settings.
(Optional) Configure other camera parameters depending on your requirements.
To send the request, click Execute.
When the SmartFace camera is enabled, then the video processing should be running and face objects should be available in Nx Witness.